Step-by-Step Guide to Creating Your First Support Chatbot
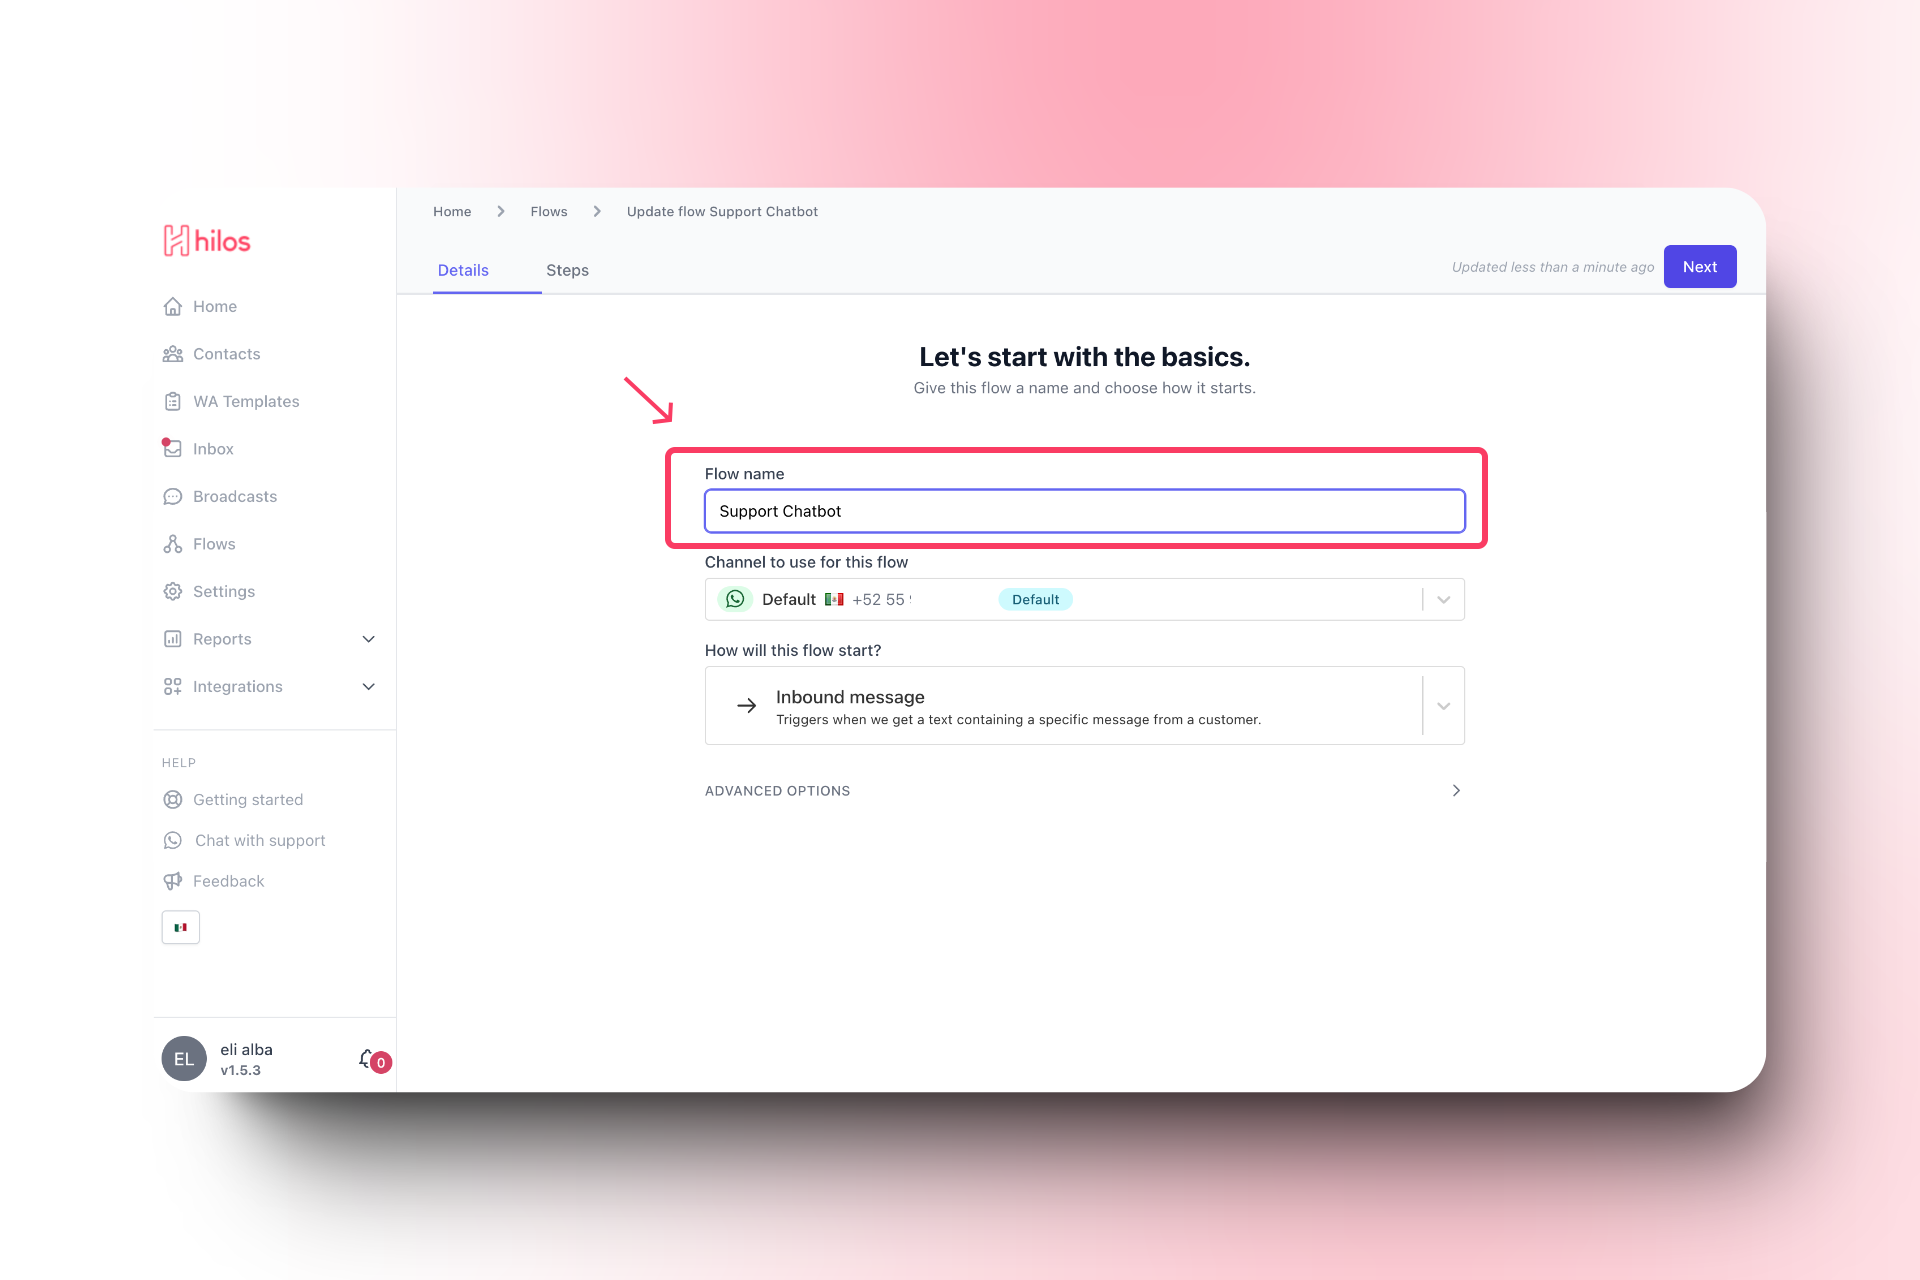
Create a New Flow
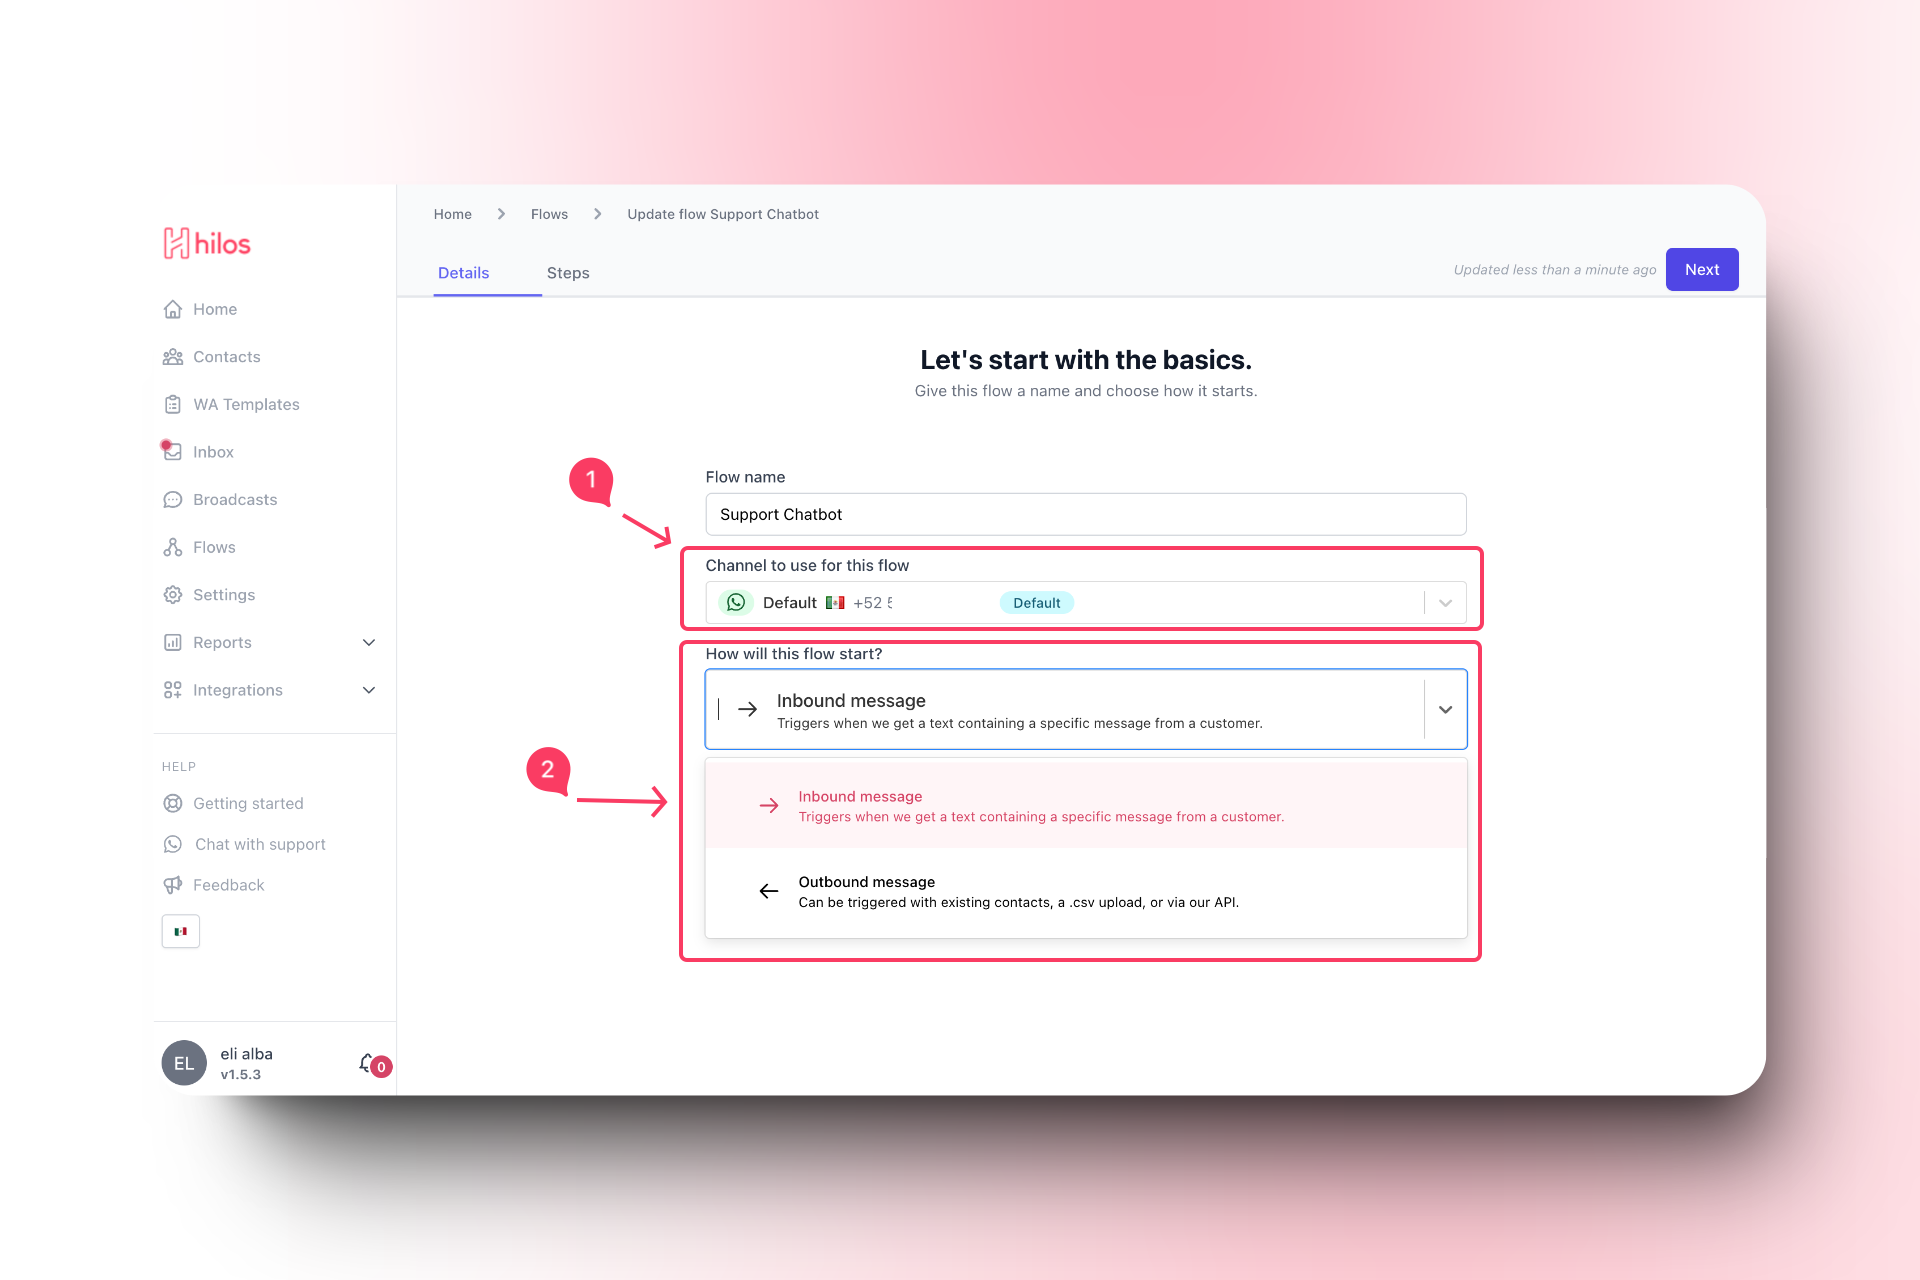
Create a new flow
Navigate to Flows
- Go to Flows in your Hilos account.
- Click on
+ Flow Editorto create a new flow.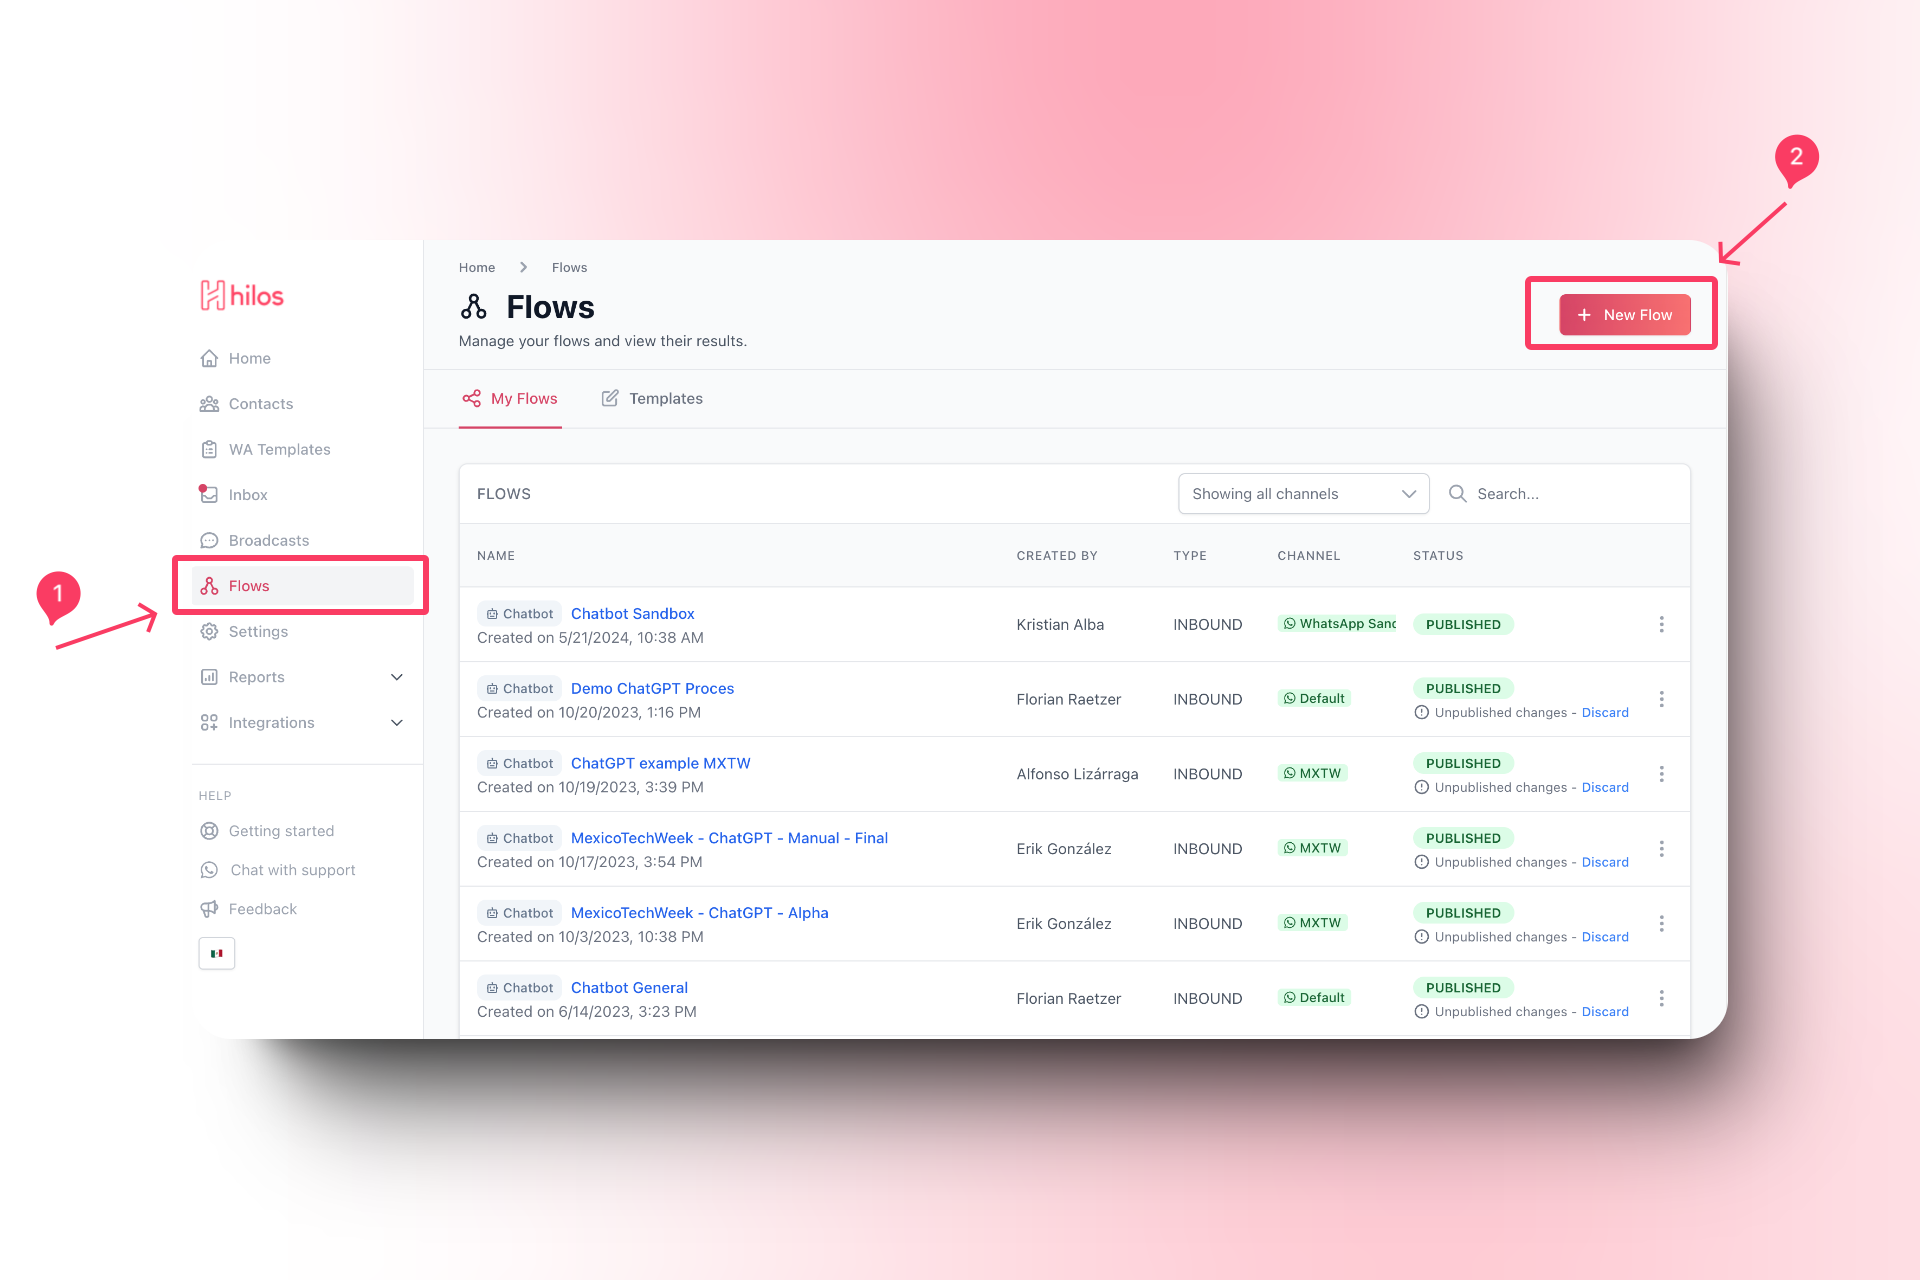
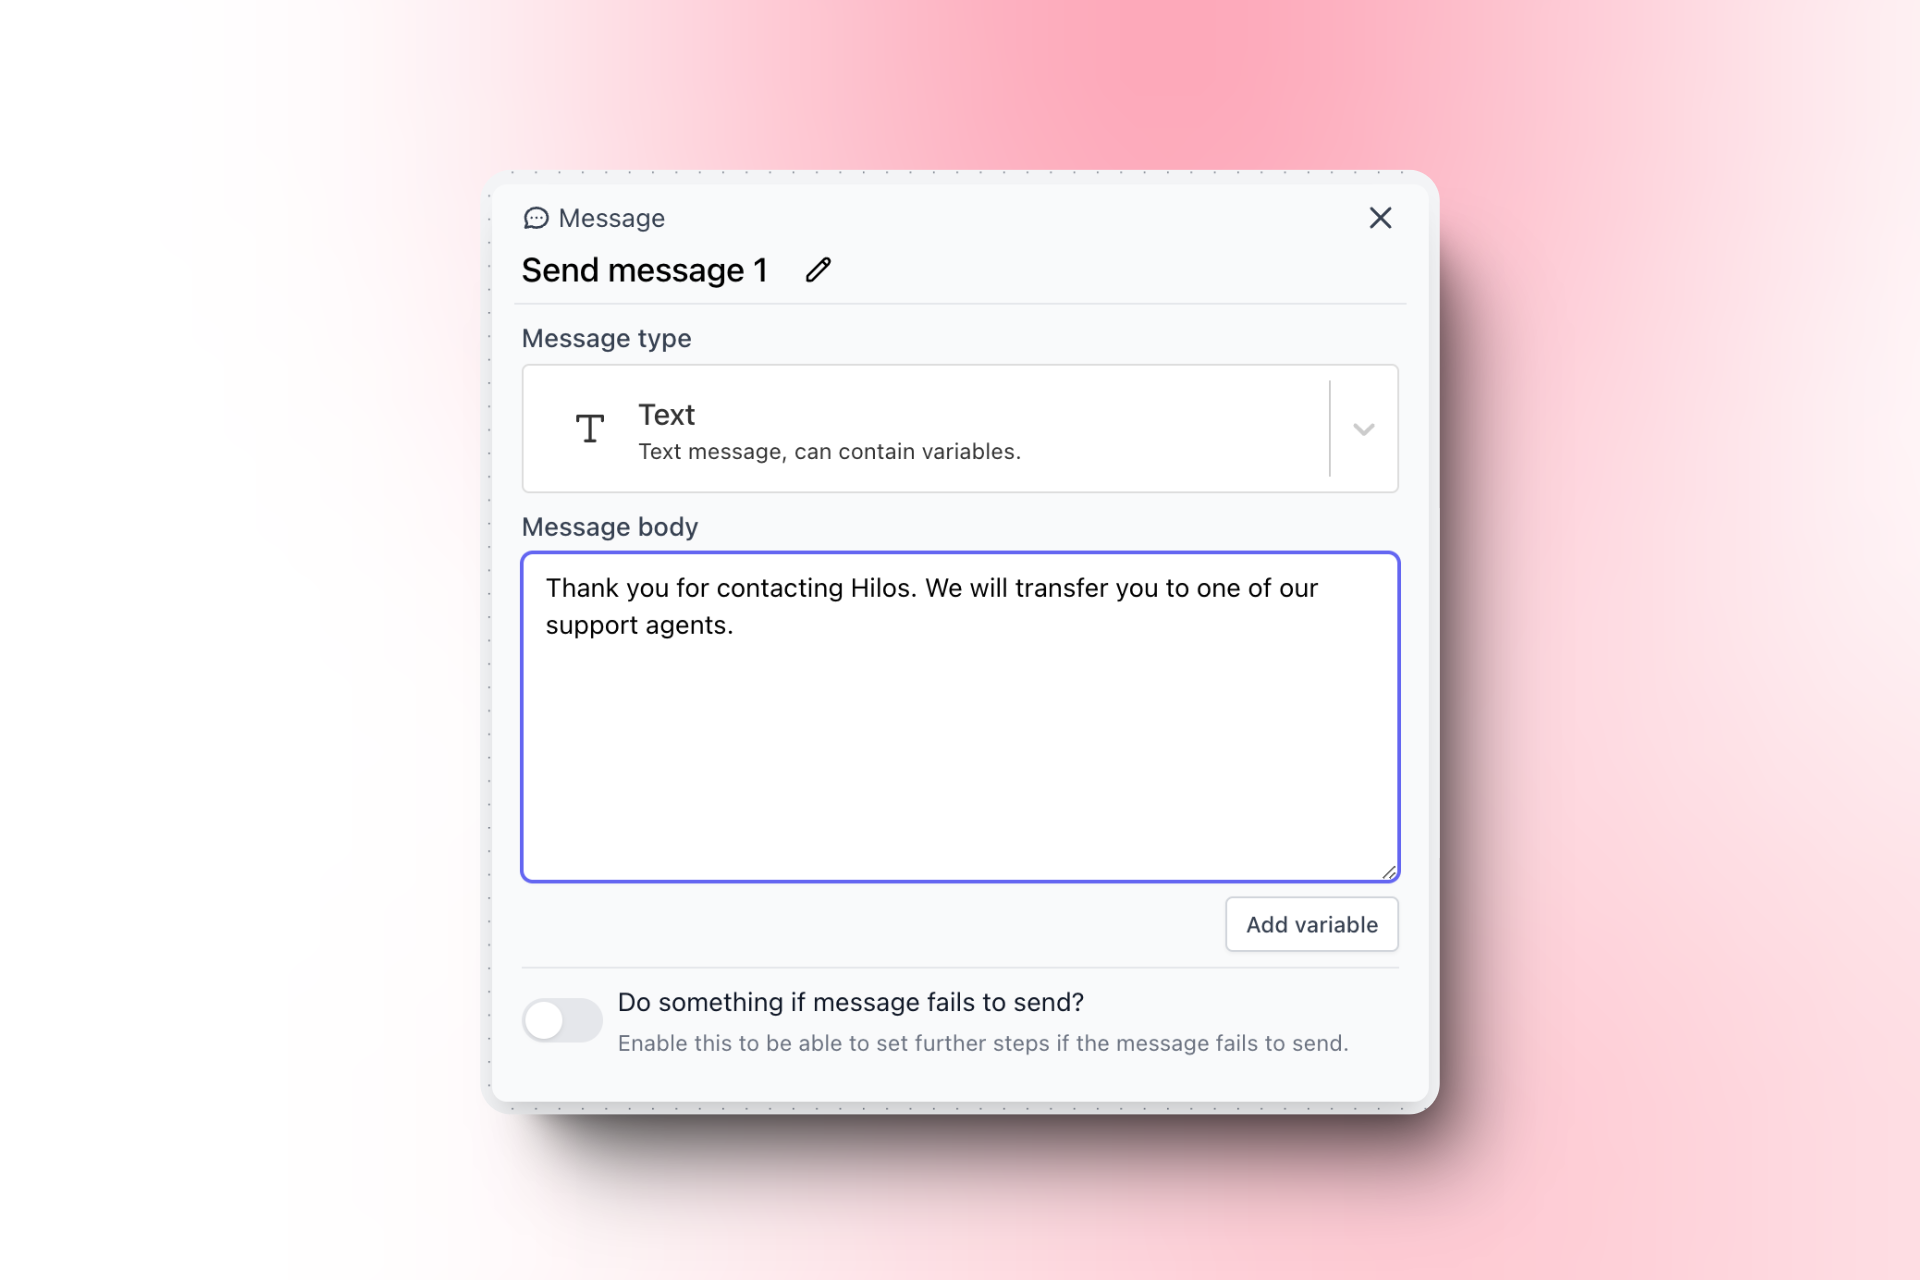
Add a Message Step
To add a message step:
Add a Message Step
- Click on the
+button to add a new step. - Select “Message” from the list of step types.

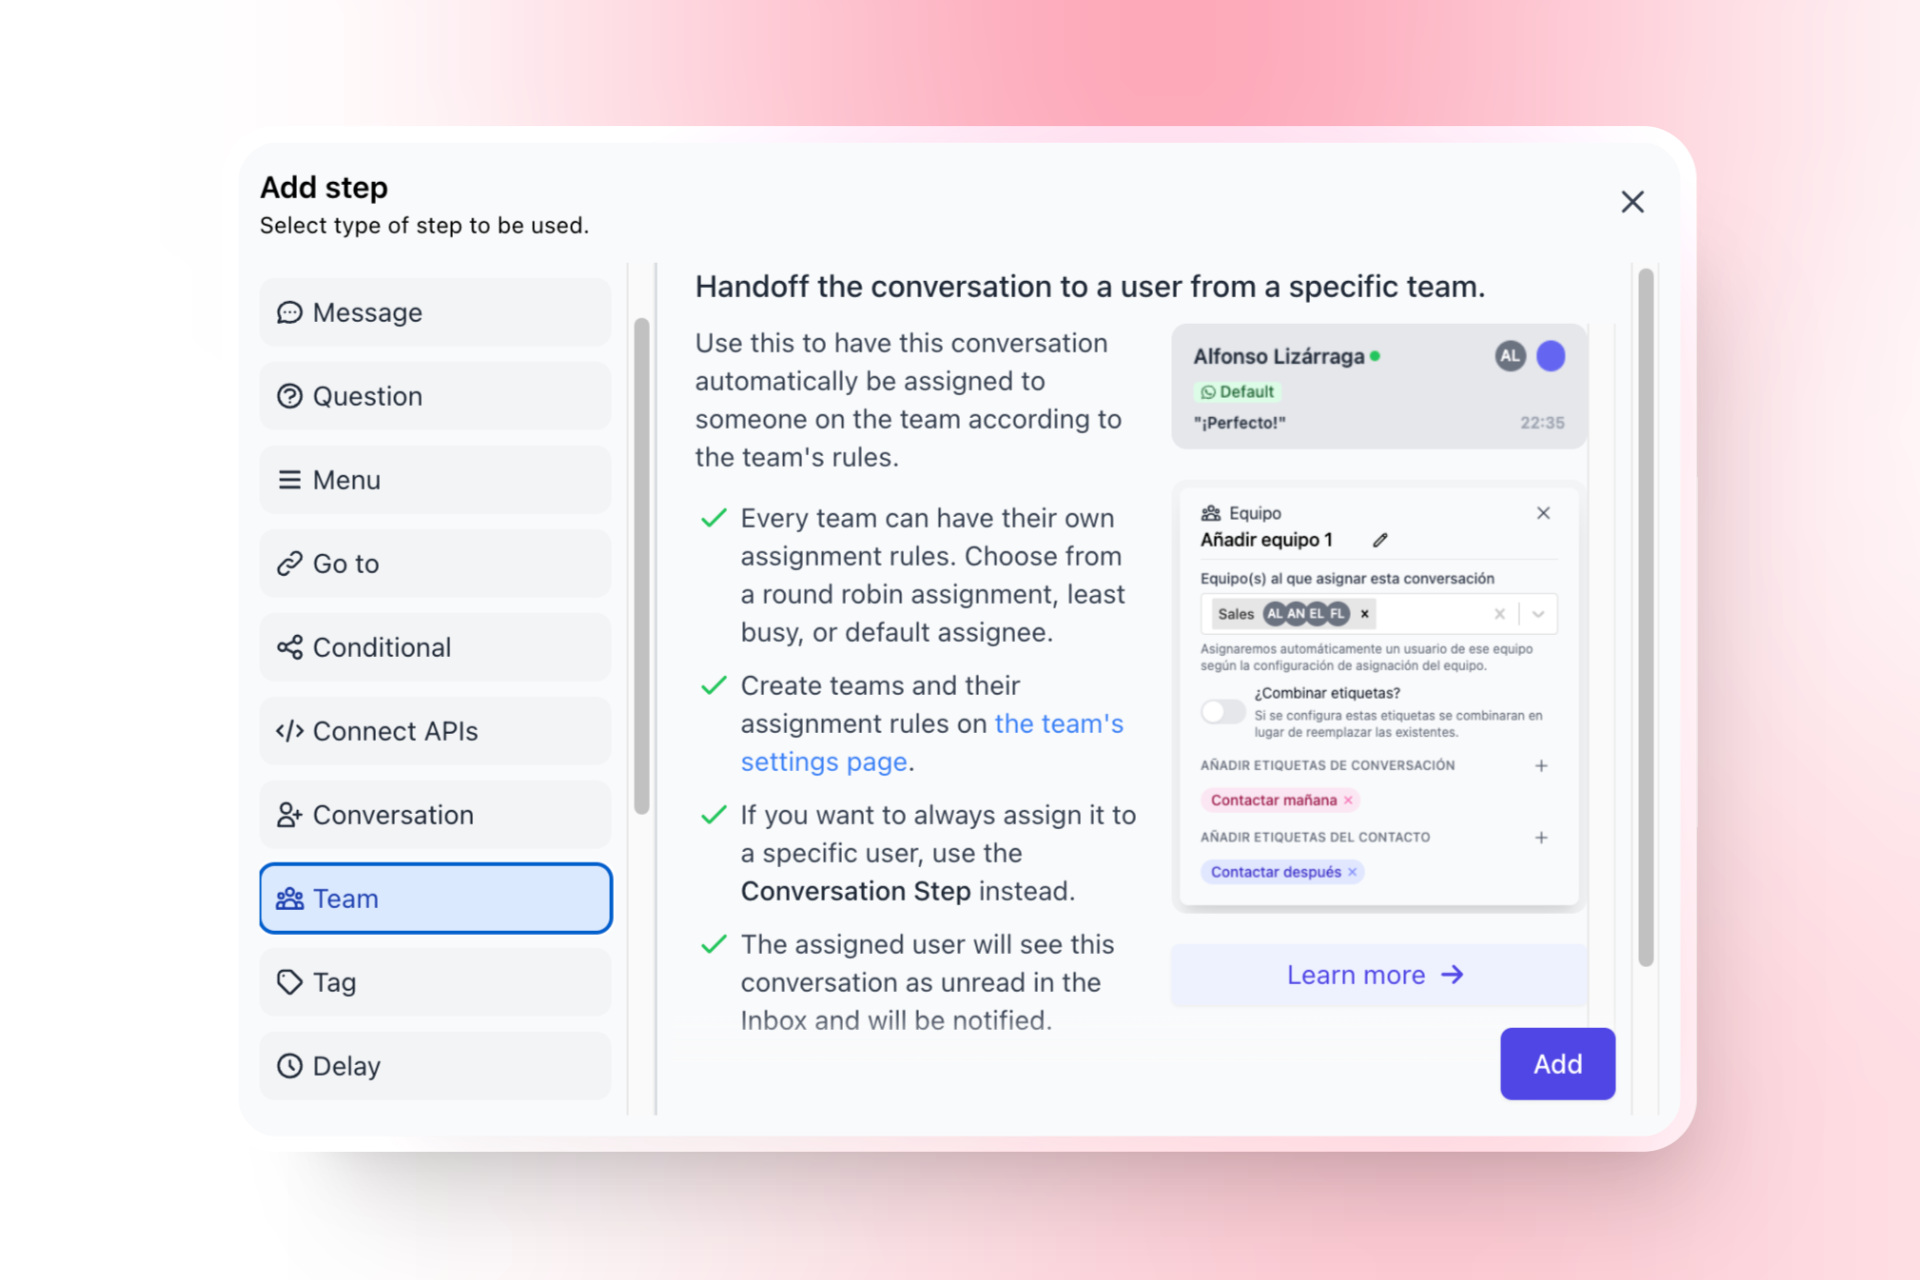
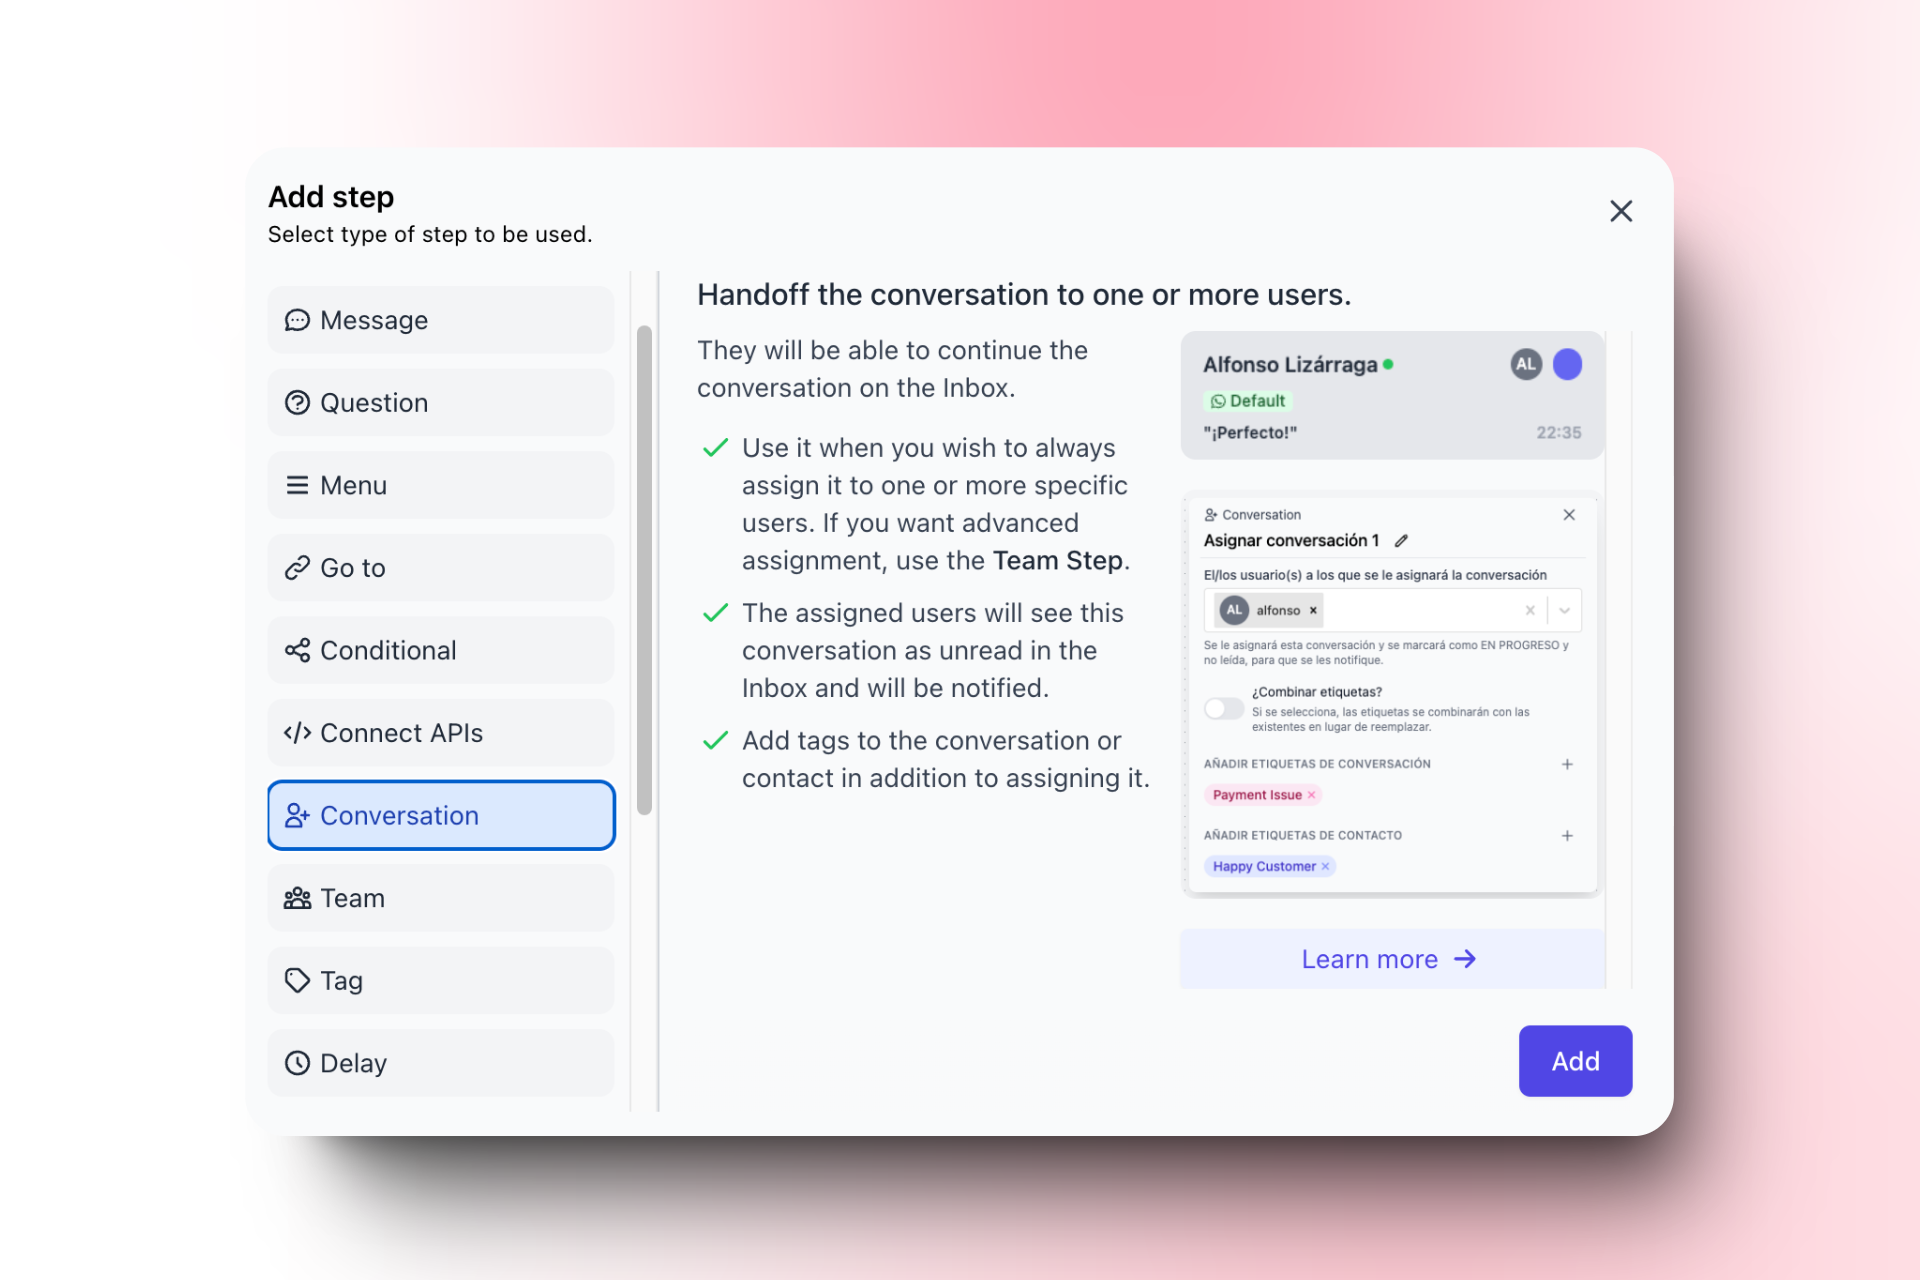
Add an Assign Team Step
To automatically assign your chats:
Add an Assign Team Step
- Click on the
+button to add another step. - Select “Assign Team” from the list of step types.
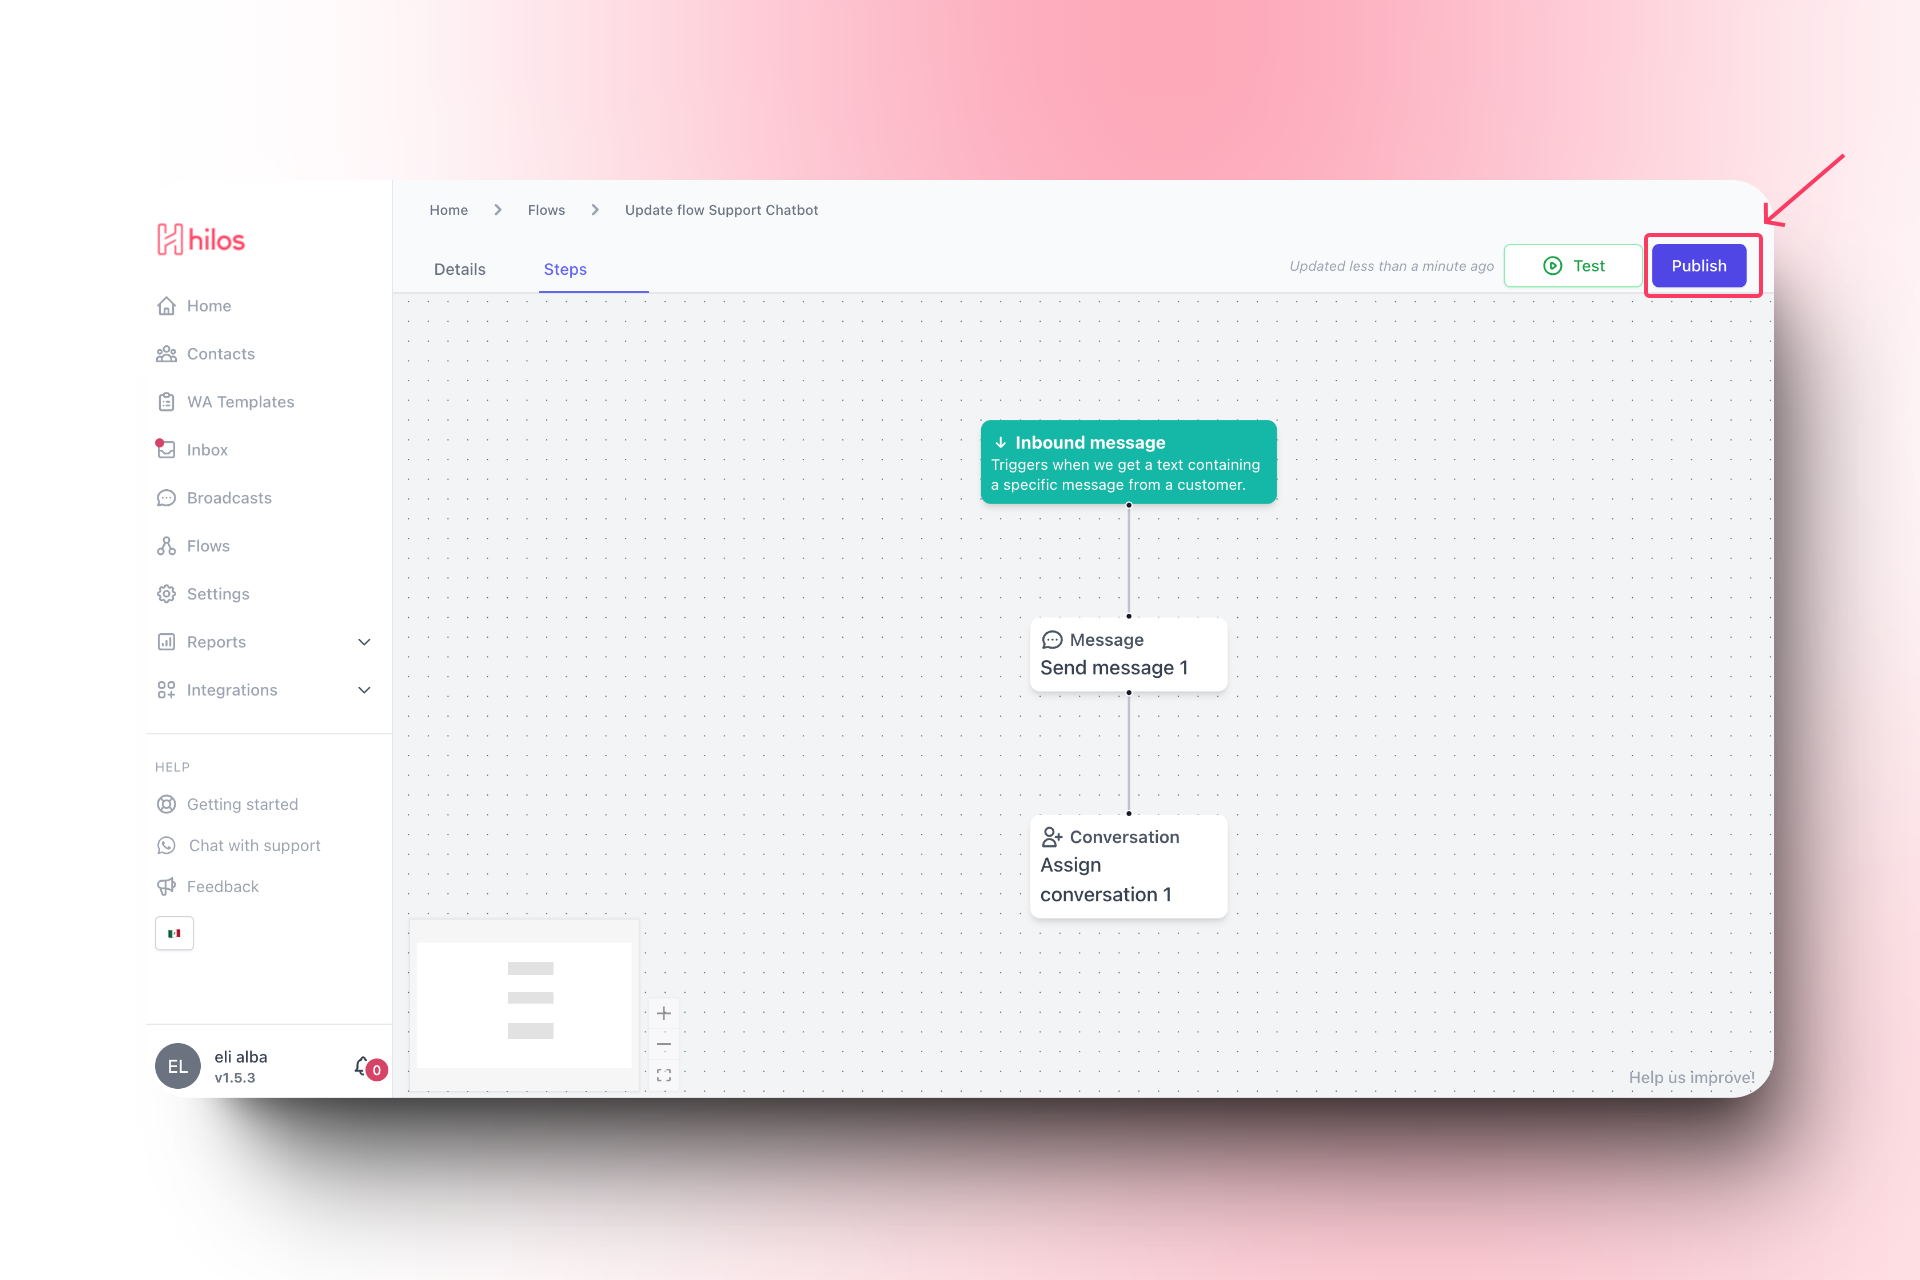
Example Flow Structure
Your flow should now have the following structure:Message Step
Sends a message to the user:Thank you for contacting Hilos. We will transfer you to one of our support agents.
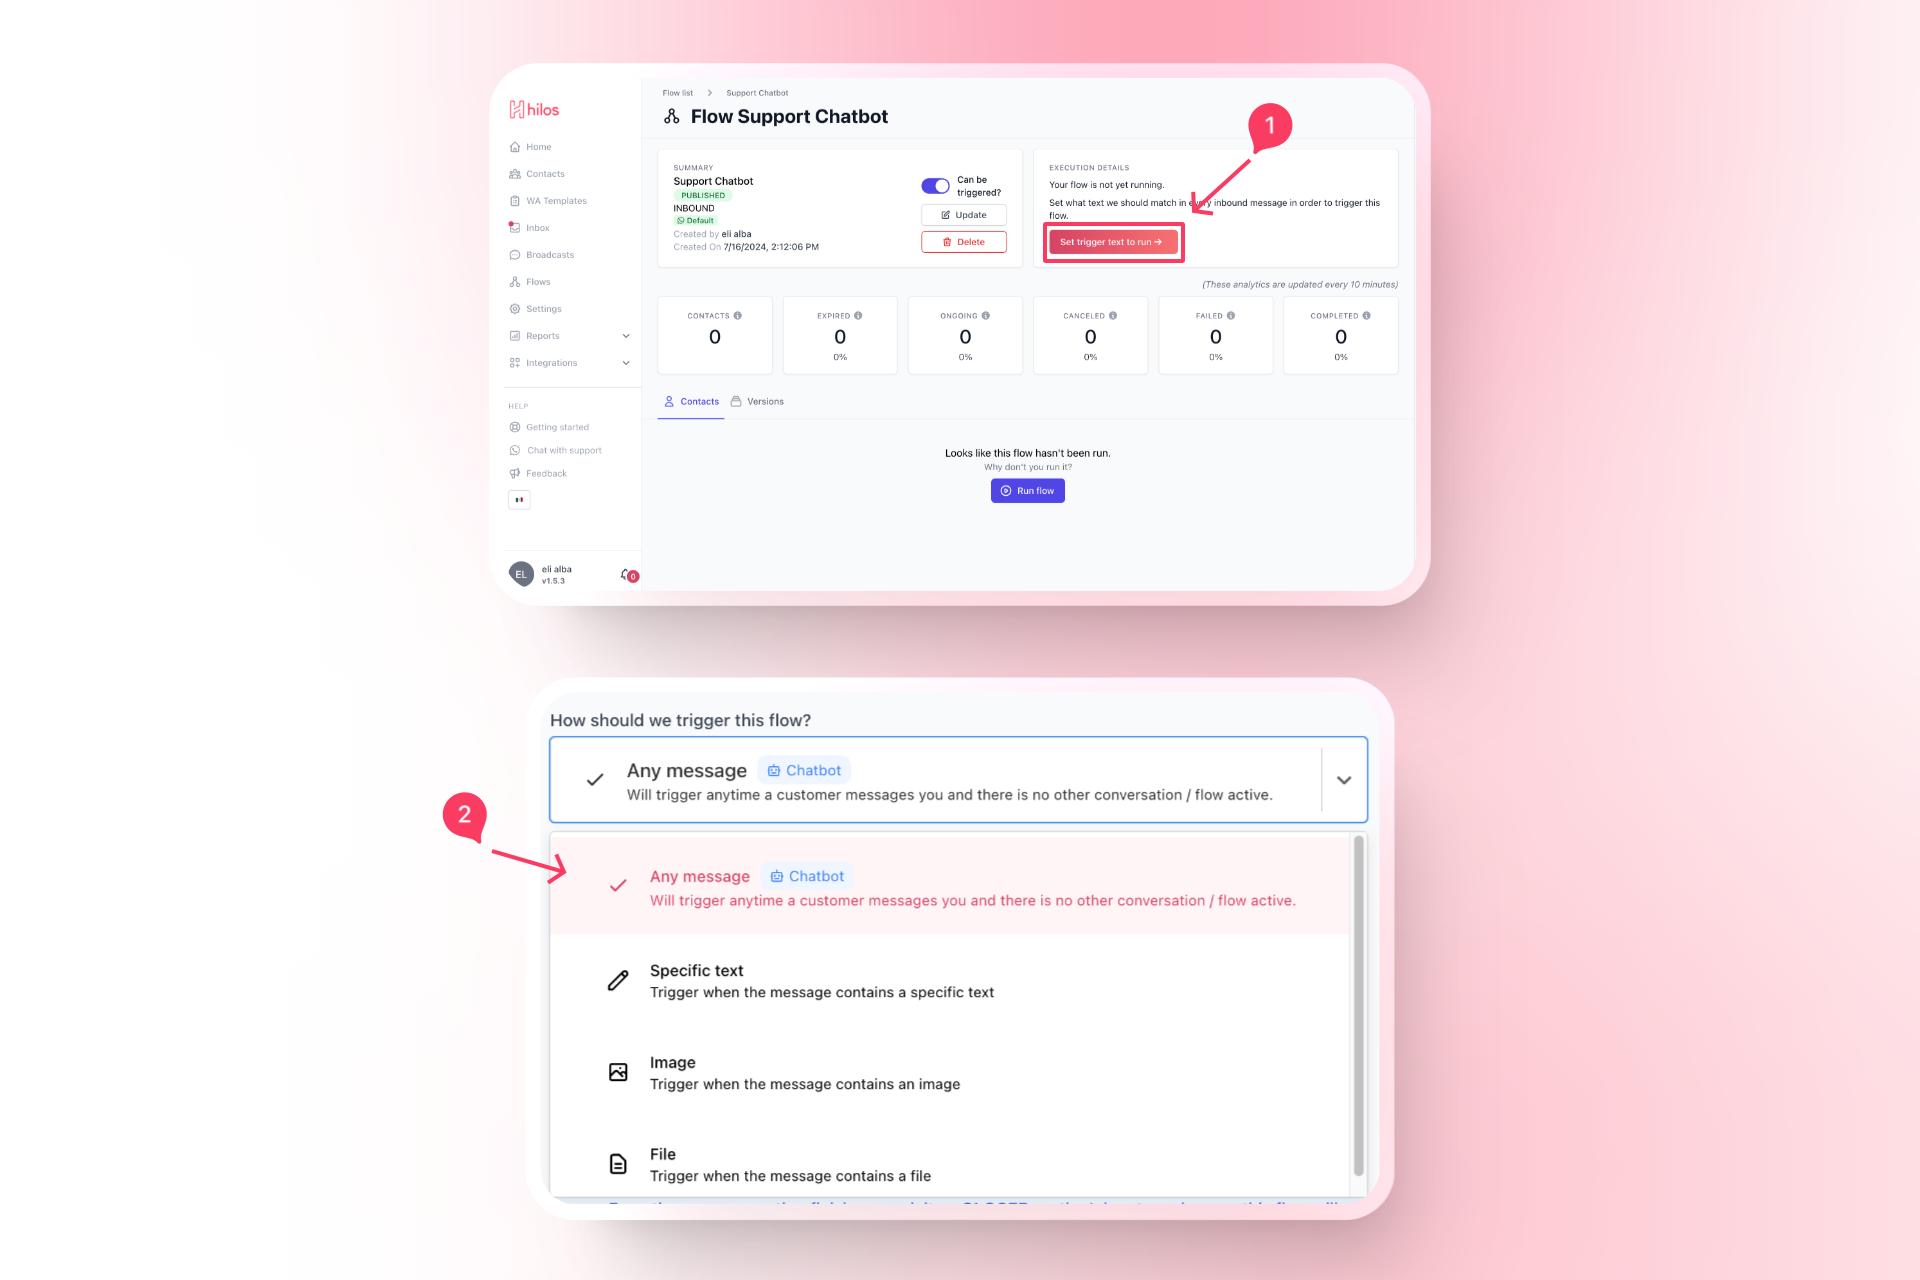
Final Steps
Test the Flow
- Send a test message to your support number to ensure the flow triggers correctly and the message is sent.